
How to Configure React Native Easily
React Native Environment Setup for Windows Made Easy


Hey there, friend! I'm so excited to welcome you to my very first blog on Hashnode. Are you just starting out with React Native and feeling a little overwhelmed with setting up your first app? No worries - you're in the right place!
First things first, let's clear up the misconception that you need high-end gadgets to kick off your React Native journey. All you really need is your trusty laptop where you usually do your coding and an Android device to test your app. That's all there is to it!
Now, let's embark on this exciting adventure together and set up your first React Native app.
Installing dependencies
Oh, do you know what you'll actually need to get started? Just Node, a JDK, and Android Studio! And hey, don't get me wrong - when I say Android Studio, I don't mean we'll be using it to write our codes. No way! We're just going to use it for some initial setup. How intriguing, right?
Installing Node, JDK
You can install Node and JDK from their respective websites, it is recommended to install LTS version of Node. But it would be much easier if install Node and JDK via Chocolatey, a popular package manager for Windows.
If you don't have Chocolatey, no worries! Just check out this article and you'll have it installed in no time. Trust me, it's super easy.
Once you get Chocolatey, open Administrator Powershell (right-click Powershell and select "Run as Administrator"), then run the following command:
choco install -y nodejs-lts microsoft-openjdk11
Once nodejs and jdk are installed, verify their installation by using node --version and java --version in your terminal respectively.
from React Native official docs:
If you're using the latest version of Java Development Kit, you'll need to change the Gradle version of your project so it can recognize the JDK. You can do that by going to
{project root folder}\android\gradle\wrapper\gradle-wrapper.propertiesand changing thedistributionUrlvalue to upgrade the Gradle version.
Setting up Android development Environment
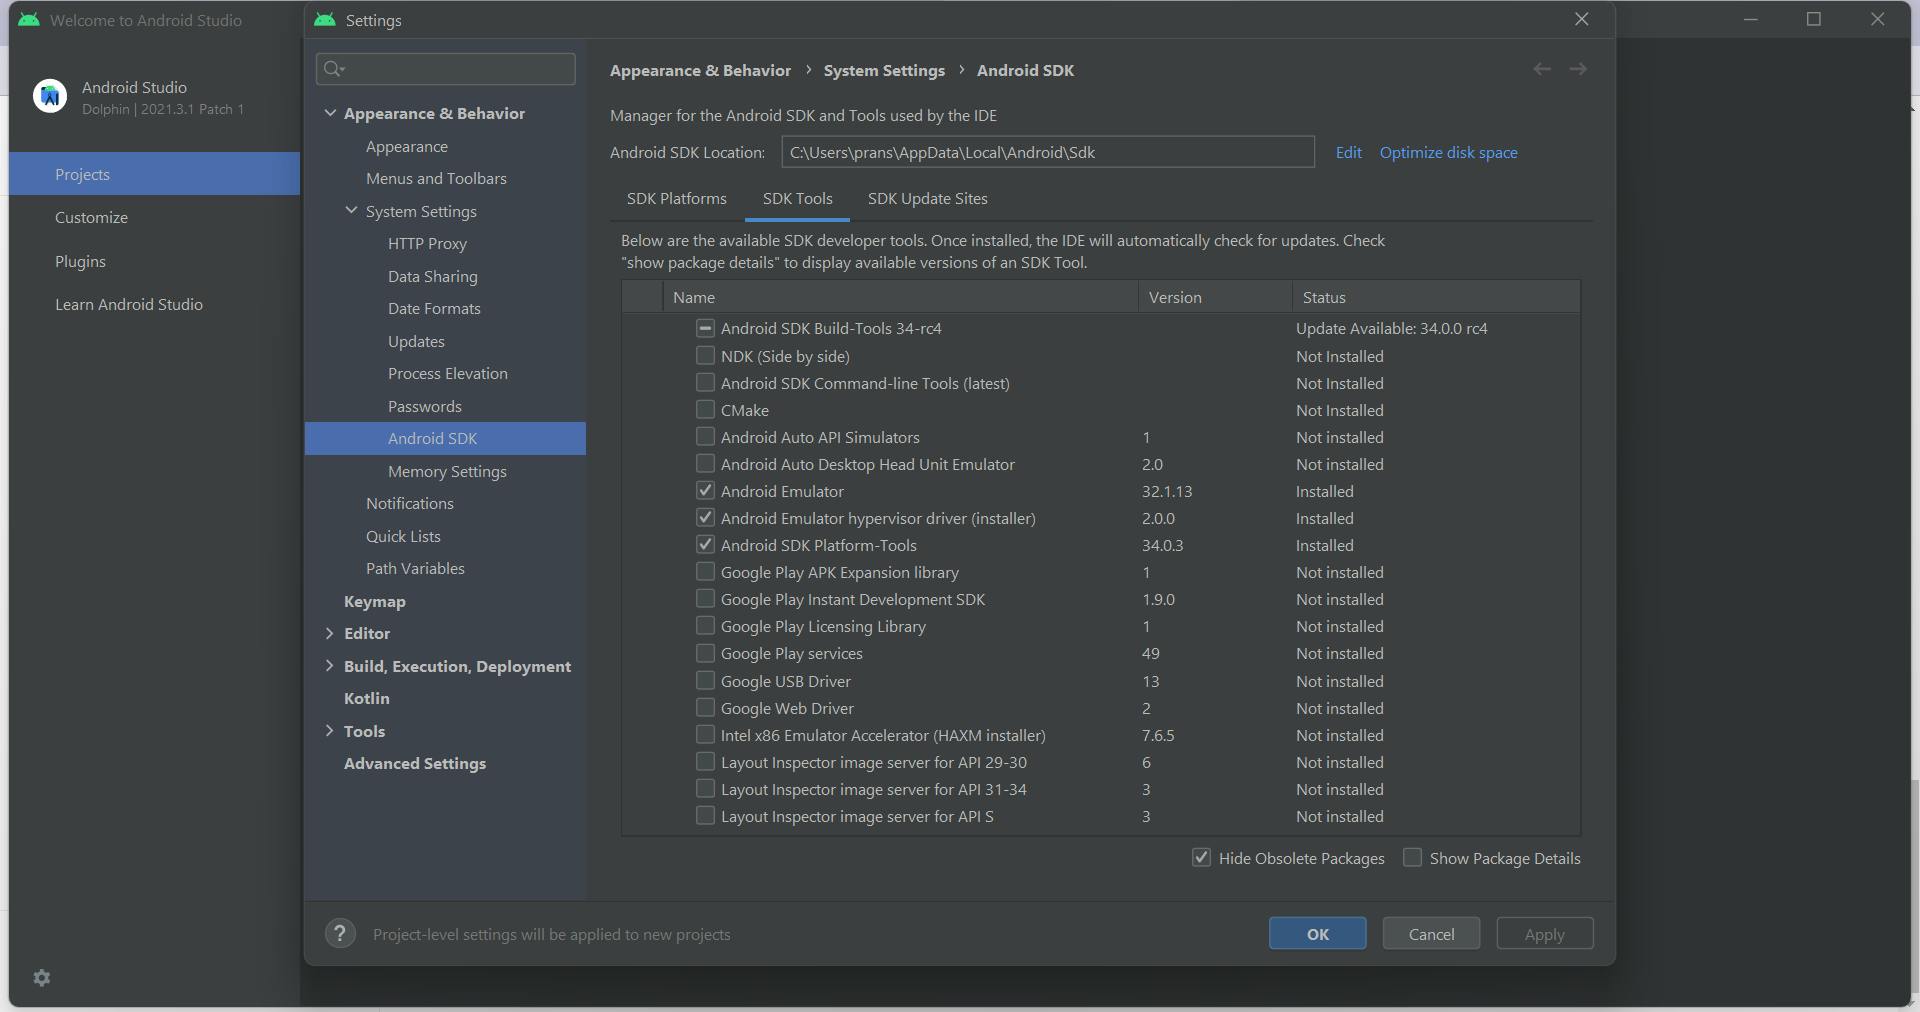
Download and install Android Studio On the installation wizard, make sure to tick the boxes next to Android SDK and Android SDK Platform and install them. Once Android Studio is installed, open it. click on More Actions > SDK Manager. Under Appearance & Behavior > System Settings > Android SDK > SDK Tools, verify that Android SDK Platform-Tools, Android SDK Build-Tools, Android Emulator, and Android Emulator hypervisor driver are installed. That's it, now we never gonna need to open this App again.
Configuring some environment variable
For React Native tools to work properly, we need to add some environment variables.
Hit windows key (🪟) on keyboard and type 'edit the system environment variables'.
Click and open
Edit the system environment variablesClick on Environment Variables.
Click New to create a new
ANDROID_HOMEuser variable.
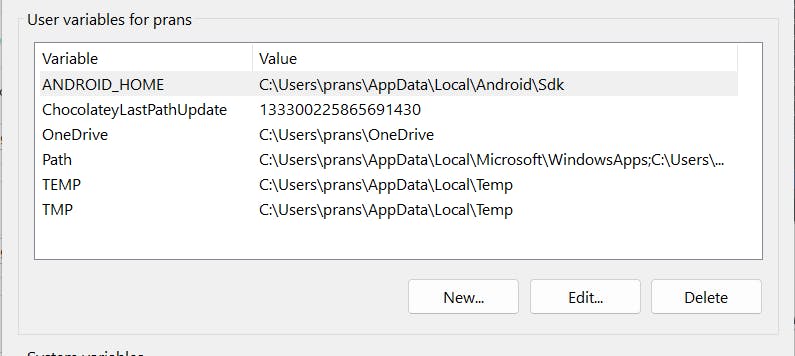
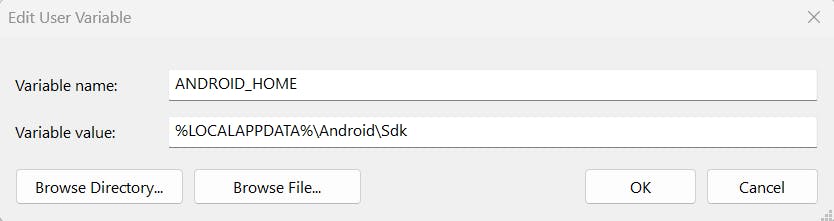
The SDK is installed, by default, at this location
%LOCALAPPDATA%\Android\Sdk
We can verify that ANDROID_HOME is successfully added, by following the steps mentioned below:
Open PowerShell.
Copy and paste
Get-ChildItem -Path Env:\in the terminal.Verify if
ANDROID_HOMEhas been added.
Now that we've successfully added ANDROID_HOME, we're going to Add platform-tools to Path
Follow the same steps as above to open Environment Variables.
Double-click on the Path variable.
Add the path to platform-tools to the list.
The default location for this folder is:
%LOCALAPPDATA%\Android\Sdk\platform-tools
Creating your first React Native application
So, we're about to use npx to launch your very first React Native application! Can you believe it? Let's call our shiny new app "FirstProject"!
Get ready to create your groundbreaking app! Just open your Terminal, and with a burst of excitement, type in this fantastic command:
npx react-native init FirstProject
We've finally got your first-ever React Native application. I will catch you up in my next blog where I will show you, how you can run and play with your first React native app.
Thanks :)